想いますが当分更新ダメかもです。何故なら謎の洪水が起こってしまいました。
ええ、謎なのです。一寸お昼寝時間を取ってからお片付けをして御休みなさいをしようと思ったのですが。昼寝から起きたら、床が何故か水波波。え?っと思って慌てて風呂場に駆け付ければ何故か蛇口の水が出しっぱなし。・・・・・・・シクシクです。
三時間四時間程水をバケツに、床掃除でした。寝れたのが朝の三時過ぎ。明日仕事。でもって絨毯敷いていたりするので未だ水ピチャピチャ。当分後片付けに追われそうです。
でも、大掃除も出来て良いかも。
と思うことにします。
ハイ。
という訳でその内あるかもないかもです。
So, I had a flood for some reason. Woke up after a power nap and my bedroom floor was wet. Really wet. Like an inch or so of water, wet.
Ran to the bathroom and for some reason, the water faucet was running in the tub. Overflowing, you might say.
Took about 3 or 4 hours before I could get rid of most of the water. Got to bed at 3 a.m. and went to work. The carpeted areas are still soaking. Thinking about cutting them out - after I get a new pair of scissors. Maybe a stronger one this time that won't break?
So, I'm cleaning up the house. For a while.
At least I should have a clean house at the end of this. SO, maybe I'll be back after this is all over. Maybe not. Maybe I'll be on another pack by then. Or maybe not. Who knows......
And the reason for the flooding? Snores away peacefully, without a clue on what's going on...........
Friday, September 19, 2014

Tuesday, September 16, 2014
I forgot.....
about my blog. What a hetare, I am. Boohoo. Shikushiku.
Hah. What? Not like anyone is waiting for the pnuepnuecraft thing, right? Right? *looks away*
Anywayz, Pnuematic craft. It's becoming rather popular nowdays, or maybe unpopular would be a better word for it? Because it's so Bah, humbug. But onward and upward we must go if we're to complete our Crash Landing quests and progress into a life of leisure via automation. Besides, a smoothie or two would be nice, no?
So, to begin our quest into pnuecraft, we begin by making some TNT. Because the quest requires us to. Then I like to put it in a frame - if I have the leather to spare cuz really, you think I'm going to use a TNT to make compressed iron? Me, Ms. Clutzy? Ms. Hetare? Uh, no. I can be my worst enemy and I know it. So up goes the frame and we make instead the baby TNT aka Tiny TNT from the Applied Energistic mod because it works just as well and doesn't cause as much of a destruction as a regular TNT explosion would. But just to be safe, as causing an explosion in your base and having your walls come tumbling down would be a bad idea, I like to make a small detonation chamber. Nothing fancy, just a box with compressed cobblestone walls around it. All you do is set the tnt, toss in some iron, flip a lever and run away. Just in case. Come back after the explosion, and wallah, your newly formed compressed iron is made. Unfortunately, when you make compressed iron in this manner, it means you need to prepare for some losses because explosions will do that to you. It makes you lose some of your iron. So if you need a stack, best make two to be sure. And you will need a lot of the compressed iron - if you're playing 1.1, which I was in this playthrough. 1.2 however, lets you steal the necessary components of the mod from the abandoned city so you may not have to do this if you go city raiding.
In any case, after wasting some iron, and having some fun blowing things up, we now should have a stack or two, or three, but hopefully at least four stacks of compressed iron. Yes, I know it's a lot but I like to do the dangerous stuff while I still remember that it's dangerous so doing it all at once is a good thing. This way I won't have to risk coming back to this later if I should run short. And this lets me get it out of my system, the need to blow things up. Crazy, as it sounds, I rather like doing it sometimes. Worries me...sometimes.
At any rate, the reason we need so much of this compressed iron is because we need to build a multi-block structure so we won't ever have to play with the tnt again - if all goes well. The pressure chamber - built in a 3 x 3 cube made of, you guessed it, compressed iron. It consists of mostly chamber walls which are made of 4 compressed iron. You can also throw in a chamber window so you can see when your items are done. And chamber valve so you can supply it with pressure via the air compressors. So to make a pressure chamber, you'll need at least 1 chamber valve, 25 chamber wall and at least 1 chamber window. The number of walls and windows can change - if you use more windows to look into the chamber as it is working you'll need less walls. I normally like having at least 3 windows to look in on the process. Cheap entertainment.
Anywayz, once you select your site, you lay down your chamber walls in a 3 x 3 grid. Think smelter layout. After this, we leave the middle section open and put in 4 walls in the corner of the 2nd layer. Put in the valve in any one of the open block spaces between the wall blocks. Then fill in the rest of the open spaces with either windows or walls - remember LEAVE THE MIDDLE SECTION OPEN. Now do another 3 x 3 grid on top with walls. This completes your pressure chamber - by the way, it really doesn't seem to matter which way to blocks face - unless it bothers your OCD. Though if you put the windows in the wrong way, you wont' be able to see what's going on inside so I guess you might want to watch out how you place the windows?
Now when you first start doing this, you might not have made the Chamber Interfaces yet. In this case, you'll have to break some blocks to access the items you put into the pressure chamber. If you did though find some or have some laying around, you can put them in one of the sides that face the chamber - in my case I put them on the top and bottom of the chamber. I also attach a chest and
hopper on the top and bottom to put in and pull out items from the chamber so I no longer have to break the chamber open. The Chamber Interfaces do have a right-wrong side so be sure to put these blocks in facing the correct way. I is for in and O is for out might be an easy way to remember if you can't quite remember the color difference of orange and blue. And if all else fails, put it in and break it out later if it's facing the wrong way you'll know because it won't pull or put in the items as you want from the chests.
Now, to power your chamber we need some air compressors. One is fine, though two might be faster. Three is overkill though if you feel the need I suppose you have the iron to waste so go for it. A block of coal/charcoal is normally enough to power up the chamber to the appropriate pressure for most items you'll want to make in the chamber. Get some pipes and run them over to the pressure valve so it can pump in the air to pressurize the chamber. You might want to attach a pressure gauge to one of the pipes at this time so you can keep an eye on how much pressure it running through your system. Because if you run it and it goes over the capacity of the system it will explode. And you'll lose a few pipes and parts, if you're lucky. I'm lucky it normally happens to me when I go away to do something else.
Of course, you could prevent this if you ran some redstone from the gauge to your compressors to turn them off when they receive a low redstone signal that matches the blowing point of the pipes. Or if you ran them to the safety valves even, so it would release pressure from the system when it reached a certain signal strength. But as we know my math skills and redstone skills are vastly lacking, we'll just keep letting them explode. Has nothing to do with the fact that I don't have the room to run enough redstone through to do it. Nope, nothing at all to do with the fact that I'd have to widen the room more to do this correctly. I just can't do the math right.
At any rate, with this, we finally have a somewhat functional pressure chamber so we don't have to constantly play with tnt. Because now all we do is build pressure in the pressure chamber, and throw the iron in before sealing it off until it converts into compressed iron. This also lets us create other items that we can't with just playing with tnt. Things that we need to modernize like the machine frame/block. And finally, it might also be a good idea to get a life upgrade so when you do leave the items in the chamber they won't decompose and disappear before you remember you left them there an hour ago.
Hah. What? Not like anyone is waiting for the pnuepnuecraft thing, right? Right? *looks away*
Anywayz, Pnuematic craft. It's becoming rather popular nowdays, or maybe unpopular would be a better word for it? Because it's so Bah, humbug. But onward and upward we must go if we're to complete our Crash Landing quests and progress into a life of leisure via automation. Besides, a smoothie or two would be nice, no?
 |
| Hetare = more work |
In any case, after wasting some iron, and having some fun blowing things up, we now should have a stack or two, or three, but hopefully at least four stacks of compressed iron. Yes, I know it's a lot but I like to do the dangerous stuff while I still remember that it's dangerous so doing it all at once is a good thing. This way I won't have to risk coming back to this later if I should run short. And this lets me get it out of my system, the need to blow things up. Crazy, as it sounds, I rather like doing it sometimes. Worries me...sometimes.
At any rate, the reason we need so much of this compressed iron is because we need to build a multi-block structure so we won't ever have to play with the tnt again - if all goes well. The pressure chamber - built in a 3 x 3 cube made of, you guessed it, compressed iron. It consists of mostly chamber walls which are made of 4 compressed iron. You can also throw in a chamber window so you can see when your items are done. And chamber valve so you can supply it with pressure via the air compressors. So to make a pressure chamber, you'll need at least 1 chamber valve, 25 chamber wall and at least 1 chamber window. The number of walls and windows can change - if you use more windows to look into the chamber as it is working you'll need less walls. I normally like having at least 3 windows to look in on the process. Cheap entertainment.
Anywayz, once you select your site, you lay down your chamber walls in a 3 x 3 grid. Think smelter layout. After this, we leave the middle section open and put in 4 walls in the corner of the 2nd layer. Put in the valve in any one of the open block spaces between the wall blocks. Then fill in the rest of the open spaces with either windows or walls - remember LEAVE THE MIDDLE SECTION OPEN. Now do another 3 x 3 grid on top with walls. This completes your pressure chamber - by the way, it really doesn't seem to matter which way to blocks face - unless it bothers your OCD. Though if you put the windows in the wrong way, you wont' be able to see what's going on inside so I guess you might want to watch out how you place the windows?
Now when you first start doing this, you might not have made the Chamber Interfaces yet. In this case, you'll have to break some blocks to access the items you put into the pressure chamber. If you did though find some or have some laying around, you can put them in one of the sides that face the chamber - in my case I put them on the top and bottom of the chamber. I also attach a chest and
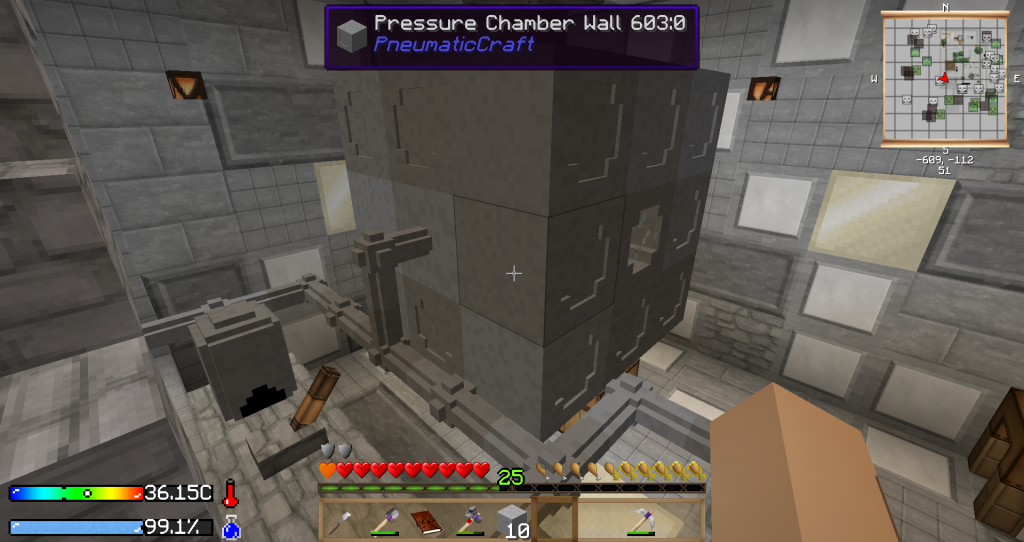 |
| Connect to the MIDDLE block - won't work any place else. |
Now, to power your chamber we need some air compressors. One is fine, though two might be faster. Three is overkill though if you feel the need I suppose you have the iron to waste so go for it. A block of coal/charcoal is normally enough to power up the chamber to the appropriate pressure for most items you'll want to make in the chamber. Get some pipes and run them over to the pressure valve so it can pump in the air to pressurize the chamber. You might want to attach a pressure gauge to one of the pipes at this time so you can keep an eye on how much pressure it running through your system. Because if you run it and it goes over the capacity of the system it will explode. And you'll lose a few pipes and parts, if you're lucky. I'm lucky it normally happens to me when I go away to do something else.
Of course, you could prevent this if you ran some redstone from the gauge to your compressors to turn them off when they receive a low redstone signal that matches the blowing point of the pipes. Or if you ran them to the safety valves even, so it would release pressure from the system when it reached a certain signal strength. But as we know my math skills and redstone skills are vastly lacking, we'll just keep letting them explode. Has nothing to do with the fact that I don't have the room to run enough redstone through to do it. Nope, nothing at all to do with the fact that I'd have to widen the room more to do this correctly. I just can't do the math right.
At any rate, with this, we finally have a somewhat functional pressure chamber so we don't have to constantly play with tnt. Because now all we do is build pressure in the pressure chamber, and throw the iron in before sealing it off until it converts into compressed iron. This also lets us create other items that we can't with just playing with tnt. Things that we need to modernize like the machine frame/block. And finally, it might also be a good idea to get a life upgrade so when you do leave the items in the chamber they won't decompose and disappear before you remember you left them there an hour ago.
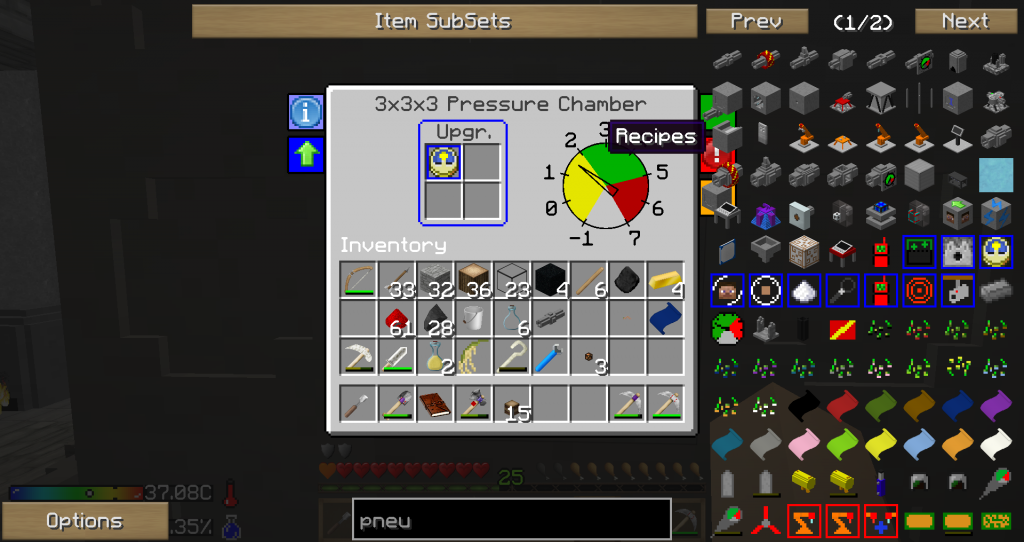 |
| Set it and forget it. |
日本語編後日改めてです。
Monday, September 8, 2014
もう少しで
CrashLandingに必要なモッドに付いての説明も終わりそうです。ヌメヌメクラフト(実名はPneumaticCraft)をザットお浚いするだけです。では、早速始めたいと思いますがその前に基地を整えます。色々と場所、材料、と時間を確保しなければ逝けない免毒さ・・・・ややこしいモッドです。言い直しても悪口になるモッドです。実際はそれなりに便利だし使い易いモッド・・・・・なのかもしれません。個人感覚による所が大きいと思います。遣れば遣るほど馴染み悪くないかもって錯覚を起こす様に成りました。毒されています。
で、英語で説明する際基地造りの順が反対になっていたので本日の説明はキチンと壁からという訳です。大体ベッドが確保出来るようになると先ず丸石製造機を作ります。基本です。AgrarianSkiesでお馴染みな物を作ります。これにAutonomous Activatorを設置します。クエストで貰えますのでこのクエストコンプを一刻も早く済ませることをお勧めします。で、ですね?此処で覚えておくことは丸石製造機には丸石と砂利が作れると言うことです。Ver1.2では重要になるかもです。
何故重要かと言うと丸石を取るには鶴嘴PickaxeをAutonomous Activatorに設置しないと逝けないからです。これをTiConの鶴嘴ですると勝手にレベルアップをしてくれます。便利です。丸石も壁作りに使えて、レブルアップもしてくれる便利性。お負けにハンマを一緒に入れておくと砂利も出て来ます。この砂利をザルに掛けてダイヤ装備を整えると暑さ寒さ耐性も出て来ます。ダイヤ装備は金属製装備と違い暑さ寒さにさほど左右されません。Diamonds are a girl's best friendとはイイモノです(Youtube検索<3)。色んな意味で。
で、話がいつもの様にそれました。丸石で壁作りを行いましょう。で、その後かなりの広場になった基地です。片隅に草畑を設置。此方では草刈りの他木狩りも行います。初期段階では技術が追いつかないので手で狩りますがその為に上がり上りの効く階段と8ブロック位の高さにガラス足場を組み立てて刈りやすいようにします。飛び降りては樹の枝に止まり刈刈刈。仕事人になった気分です。で、仕事序に草刈りも行います。Mattockを使ってクリックすると草が刈れて偶に食物の種も飛び出てきます。草は必ず一ブロック残しておくこともお忘れなく。そこから草が生えかえります。で、WateringCanを使うと草がドンドン生えかえりますので創ることをお勧めします。注意する点はWateringCanの種類は2つ在ることですが一種類しか造れないってことでしょうか?こっちが造れなかったあっちを作ろうです。
で草を刈ったり骨粉かけて又刈ったりします(処で草をそのまま刈るのと骨粉をかけて苅るのとでは種の種類に違いが有りますので両方する事をお勧めします)とかなりの数の種が取れますので専門の畑を作りましょう。畑を耕すには水がないとダメです。逆に草を刈る時は無い方が良いんです。で、水ですが貴重品です。なので畑を一ブロックの水だけで耕すことをお勧めします。個人的にこぢんまりとした感じが良いので9x9の畑を作ります。水の流れは下に無限に落ちますので次の畑も今の畑の真下に作って行くと水は一ブロックで済みます。専門畑を作るのも良かったりしました。PeanutButter&Jellyシリーズをフルーツ畑、ピーナツと米畑。 砂糖キビは他で作っていました。で、お負けですが畑を重ねたらイカも珠に沸きます。イカ畑です。
 で、身の安全を壁で図り、畑らで水と食べ物の安全も図れましたので今度は材料の増幅を図ります。つまりふるいを自動化してしまいましょう。此方ではAutonomousActivatorが一個しかないのですがこの一個を今丸石製造機から外します。一応砂利がJabba一個分位になってからのお話です。大抵は壁作りが終わる頃には一杯一杯です。無くても大丈夫です。最初に言っておきます。この方法は面白かったのでこうやっているだけです。効率が良いとは嘘でも言えません。でも可愛いなと想いましたので敢えてしていました。
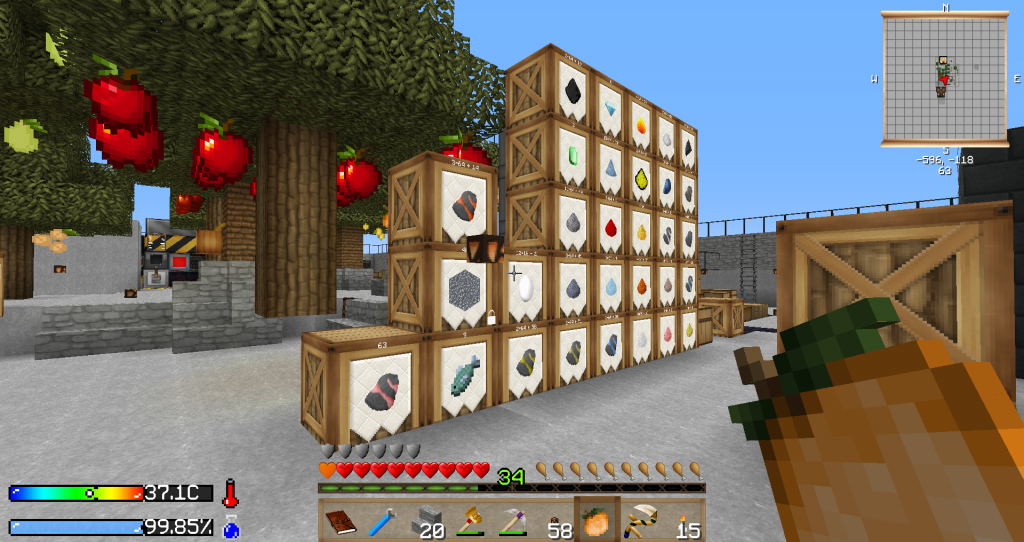
百聞は一見にしかずなので実際に自動化されている現場はこうだったりします。AutonomousActivatorを設置します。隣にレバー。又その隣にFan(Open Block)を置き、ザルをその前に設置。で、この侭オンにするとザルからの物があっちこっちに飛んでいきます。ので、真っ直ぐ走るための舗装路ならん壁を敷いて堕ちる先にはhopperとチェスト。で、チェストからNodeでJabbaに運ぶとこうなったりしました。滅茶苦茶便利なものですNodeって。自分で勝手に整理されてくれたりします。でも、この方法(ザルの自動化の事で在ってNode整理のことではないです)本当にこのマップでは遊びの為のものです。何故ってこのModPackには神様Modが入っているからです。Steve's Factory Managerでもっと効率が良い遣り方が幾らでもあったりします。Youtubeで検索なさるのも良いと思います。親切なことにMod製作者さんザルの自動化の説明会を初期段階と上級者段階に分けてアップしてくれています。態々このパックに合わせて。有難う御座いますな瞬間でした。でもVer1.1では使いませんでした。必要なかったので。Ver1.2では初期段階を使っています。便利すぎて処理が追い付かなくなるので。
で、この様に色々と基地を整理してヌメヌメクラフトに入れる様にして行かないと逝けなかったVer1.1でした。 Ver1.2では廃墟に逝ってかっぱらってくれば良いだけです。未だに逝っていません。怖くて。
さて、更新ですが馬鹿みたいに忙しい時期が時々訪れてしまい家に帰ってはバッタンキュン。ブロッグ書く前にバッタンキュウ。なので寝る事を優先しています。御休み。
で、英語で説明する際基地造りの順が反対になっていたので本日の説明はキチンと壁からという訳です。大体ベッドが確保出来るようになると先ず丸石製造機を作ります。基本です。AgrarianSkiesでお馴染みな物を作ります。これにAutonomous Activatorを設置します。クエストで貰えますのでこのクエストコンプを一刻も早く済ませることをお勧めします。で、ですね?此処で覚えておくことは丸石製造機には丸石と砂利が作れると言うことです。Ver1.2では重要になるかもです。
何故重要かと言うと丸石を取るには鶴嘴PickaxeをAutonomous Activatorに設置しないと逝けないからです。これをTiConの鶴嘴ですると勝手にレベルアップをしてくれます。便利です。丸石も壁作りに使えて、レブルアップもしてくれる便利性。お負けにハンマを一緒に入れておくと砂利も出て来ます。この砂利をザルに掛けてダイヤ装備を整えると暑さ寒さ耐性も出て来ます。ダイヤ装備は金属製装備と違い暑さ寒さにさほど左右されません。Diamonds are a girl's best friendとはイイモノです(Youtube検索<3)。色んな意味で。
で、話がいつもの様にそれました。丸石で壁作りを行いましょう。で、その後かなりの広場になった基地です。片隅に草畑を設置。此方では草刈りの他木狩りも行います。初期段階では技術が追いつかないので手で狩りますがその為に上がり上りの効く階段と8ブロック位の高さにガラス足場を組み立てて刈りやすいようにします。飛び降りては樹の枝に止まり刈刈刈。仕事人になった気分です。で、仕事序に草刈りも行います。Mattockを使ってクリックすると草が刈れて偶に食物の種も飛び出てきます。草は必ず一ブロック残しておくこともお忘れなく。そこから草が生えかえります。で、WateringCanを使うと草がドンドン生えかえりますので創ることをお勧めします。注意する点はWateringCanの種類は2つ在ることですが一種類しか造れないってことでしょうか?こっちが造れなかったあっちを作ろうです。
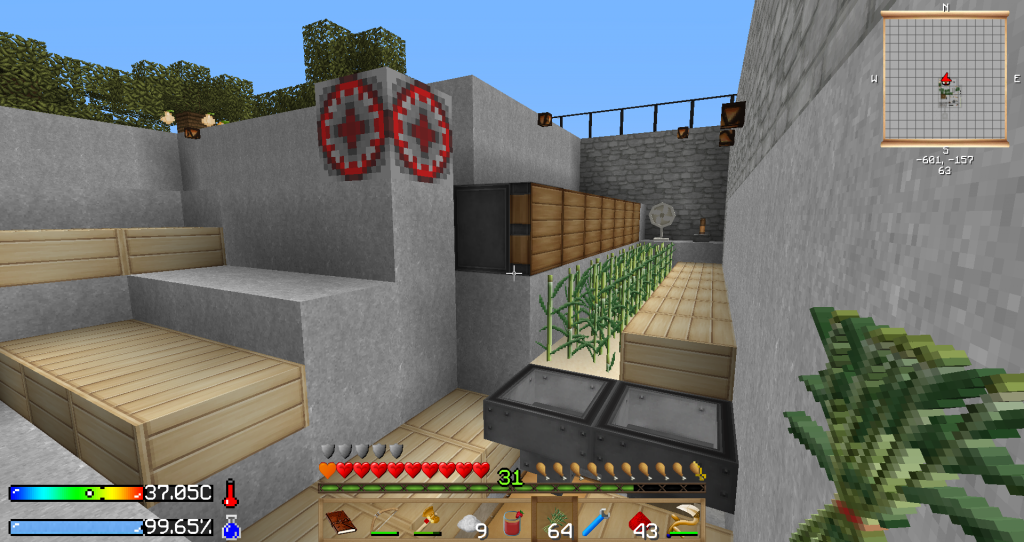 |
| 考えても無駄だったので扇風機、ピストンとレッドストーンクロックです。 |
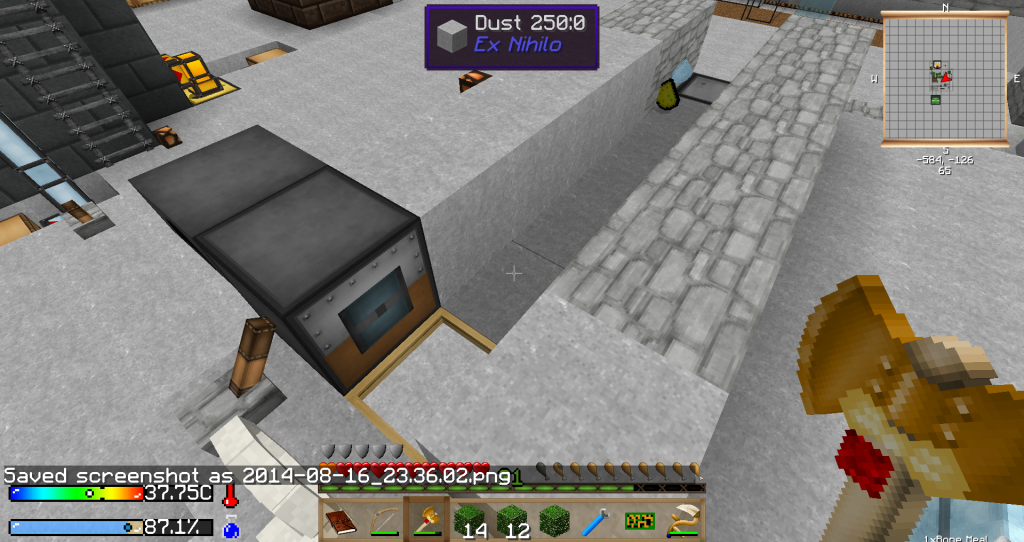 で、身の安全を壁で図り、畑らで水と食べ物の安全も図れましたので今度は材料の増幅を図ります。つまりふるいを自動化してしまいましょう。此方ではAutonomousActivatorが一個しかないのですがこの一個を今丸石製造機から外します。一応砂利がJabba一個分位になってからのお話です。大抵は壁作りが終わる頃には一杯一杯です。無くても大丈夫です。最初に言っておきます。この方法は面白かったのでこうやっているだけです。効率が良いとは嘘でも言えません。でも可愛いなと想いましたので敢えてしていました。
 |
| 片付けが下手なので便利です |
で、この様に色々と基地を整理してヌメヌメクラフトに入れる様にして行かないと逝けなかったVer1.1でした。 Ver1.2では廃墟に逝ってかっぱらってくれば良いだけです。未だに逝っていません。怖くて。
さて、更新ですが馬鹿みたいに忙しい時期が時々訪れてしまい家に帰ってはバッタンキュン。ブロッグ書く前にバッタンキュウ。なので寝る事を優先しています。御休み。
Saturday, August 30, 2014
Now onto PneumaticCraft?
Actually, no. Because before you can do PneumaticCraft there are a bunch of things you will need to get ready. This is, of course, only if you are still playing version 1.1 because if you're playing version 1.2 then all you really have to do is go adventure in the abandoned cities to salvage most if not all of the pieces needed for your pneumatics. Thus, if you were playing in 1.2, you'd have to prep for facing off with tons of mobs, spawners and the dangerous bomber pigs. Personally, I prefer prepping for a more peaceful crafting experience but to each his or her own. So, onto prepping for 1.1.
And to this end we begin by setting up some simple systems. Simple because I still enjoy puttering around on my base - if you don't I'd suggest jumping ahead and setting up your SteveFactoryManager set-ups and such for a much cleaner and compact working quarter. But I'm still enjoying my puttering so I'm sticking to my pipes - for now. Besides, I'd have to go do more research on how the heck am I suppose to use this SFM thing before I could use it, wouldn't I?
Anywayz, once I get my immediate food and water needs out of the way, I like to automate - just a bit. No machines as yet because we'd need to go do PnueCraft for that but we work with what we have. So to begin, I normally like to set up a dirty water converting station. Just a bunch of pipes and chest connected to a furnace based on old vanilla mechanics. The furnace has a pipe at the top connected to the dirty water bottle chest. The bottom pipe is connected to the water bottle chest to the furnace. Finally the pipe connecting to the side has a chest with whatever I use to fuel the furnace with - logs, coal, plants, lava buckets etc.
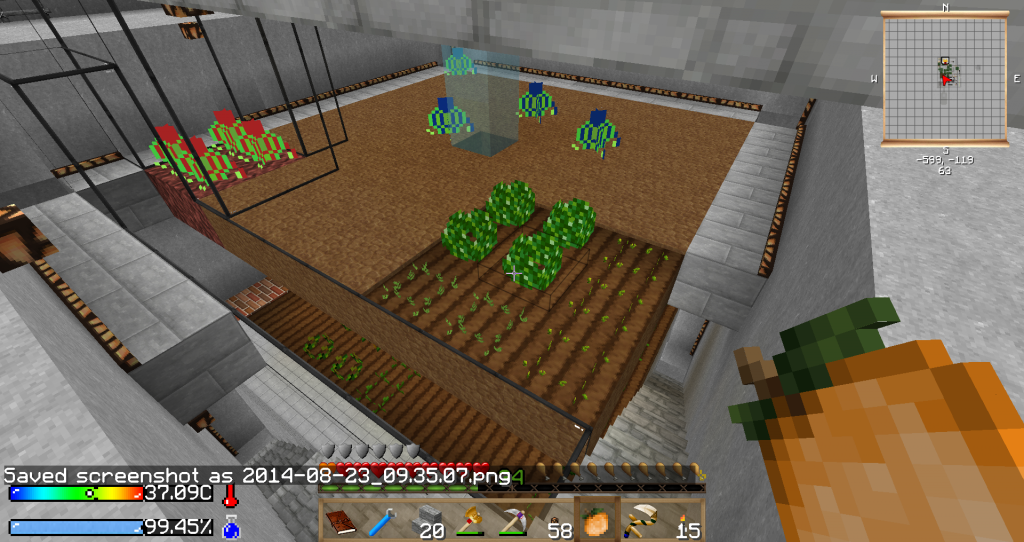
Next, we tackle the food farm by going downwards because our farm will be expanding that way.
This is because the flow of water downwards is, so far and hope it stays that way, endless. In other words, you can go down as far as you can and the water should still flow all the way down. Thus a SINGLE source block of water can create an endless 9x9 farm tower. One of these tiers will be devoted to the PneuCraft seeds production. Additionally, this waterfall will on occasion result in the death of a squid - you'll see the proof of it when you go to harvest your fields. The ink sac will be useful in pneucraft as it helps seed the production of black plastic. Pun intended.
 We also make a patch of green grass where we can grow our trees and till and bone for more seeds and Pams saplings. Just remember to remind yourself, LEAVE ONE PATCH OF GRASS so it replenishes
itself. Overhead, we construct a stairway going up so we can shear the jumbo trees without jumping as much. We also make a glass walkway overhead so the trees don't grow too large - as we're still doing this by hand and the bigger the tree the greater the hunger you will feel. Right next to it we also set-up our composting station with a chest for the organic mats connected with an item node to the pipes above the barrels and dirt taken from below with TE itemducts to the dirt chest. None of which requires a servo.
 You'll also want to make yourself a cobblestone generator. Now, you could to it with the extra utilities node as this would be a fast, cheap and easy way to make a cobble generator. You could make the stone with the pyrotheum and water by drawing the two together into a canal that meets up - if you're not derpy. I am.
Thus, I prefer the old-fashion cobblestone generator - for several reasons besides being derpy. First, I like to get both cobble and gravel at the same time. If I were to do it with the node, I'd get a lot of cobble, but the gravel, I would have to hammer from cobble. If I do this set-up, I can put my Autonomous Activator on the generator to mine cobble and hammer the stone at the same time. This would mean I can devote my hammer time to my sieving gravel time instead - because I like my bling as soon as possible (and we need a lot of iron for pneucraft). This also lets me level up a bunch of TiCon pickaxes. Which could be useful if you go to a city in 1.2 because the spawners would take a considerable time to break with just a bone/flint pick, I hear. Second, this generator will also spawn the occasional squid as a side benefit. Which can be used to craft your initial black plastic seed for pneucraft. Sometimes, you'll even find the seed already made for you in the chest. Of course, once you have enough gravel for your needs, you can also replace the AA with the item node or a terrain smasher and just get cobble.
And once you do remove the AA from the cobble generator, you can devote him to sifting for you with this set-up - no water or ender pearl required. As the gravel will yield more iron than the dust and give you diamonds for armor to boot, we'll have him do a combo of dust and gravel while we do more base building. There might be other ways that are less space consuming but I always find it kind of funny to watch my sifted items flow along the path to the dumping chest at the end. We set up the AA on one end with a fan both activated by the same lever. You can also stand across from the AA and help him along for faster sifting. The items from the sieves will float gently across the runway all the way to the end where it will drop into the hopper and then into the chest. Later we connect some nodes and pipes to a bunch of jabba barrels because it looks prettier. The only disadvantage to this set-up is - it will sometimes push you along as well. It will also push along the occasional endermen if it appears around this area.
AND of course, it goes without saying the first thing you do after getting a bed and securing your immediate water/food needs was to enlarge the ditch and wall area so you'd have the space to do all the above. But I figure that goes without saying. Seems obvious. I mean, what idiot would do all of the above without first enlarging the base, right? Right? Right? *sigh* goes back to building the walls around the trees.........
*So, if you're doing some base building? I'd consider doing some of the above from the end to the beginning of this walkthrough...........
日本語編は又後日に改めてって事で良いでしょうか?
And to this end we begin by setting up some simple systems. Simple because I still enjoy puttering around on my base - if you don't I'd suggest jumping ahead and setting up your SteveFactoryManager set-ups and such for a much cleaner and compact working quarter. But I'm still enjoying my puttering so I'm sticking to my pipes - for now. Besides, I'd have to go do more research on how the heck am I suppose to use this SFM thing before I could use it, wouldn't I?
Anywayz, once I get my immediate food and water needs out of the way, I like to automate - just a bit. No machines as yet because we'd need to go do PnueCraft for that but we work with what we have. So to begin, I normally like to set up a dirty water converting station. Just a bunch of pipes and chest connected to a furnace based on old vanilla mechanics. The furnace has a pipe at the top connected to the dirty water bottle chest. The bottom pipe is connected to the water bottle chest to the furnace. Finally the pipe connecting to the side has a chest with whatever I use to fuel the furnace with - logs, coal, plants, lava buckets etc.
Next, we tackle the food farm by going downwards because our farm will be expanding that way.
 |
| water flows down, down, down |
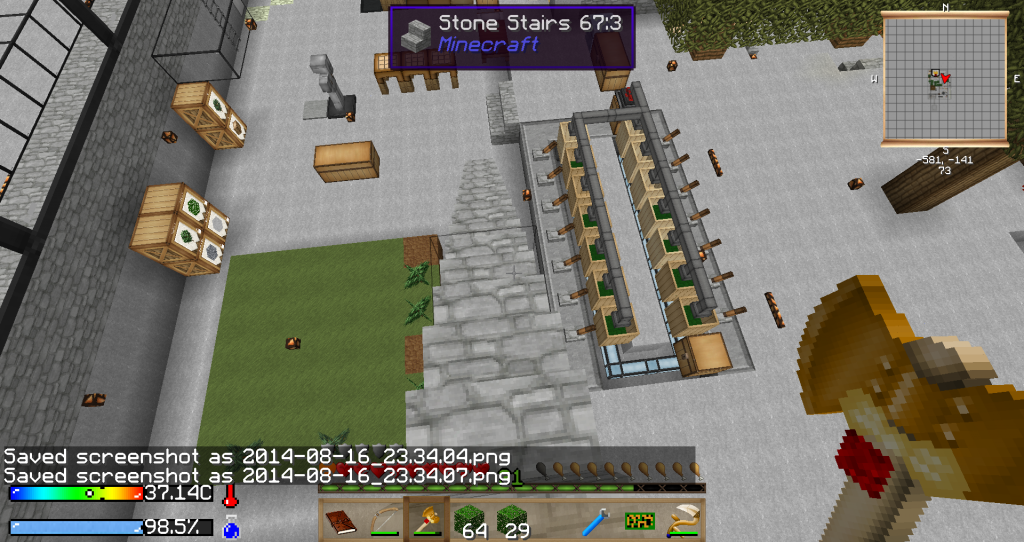 We also make a patch of green grass where we can grow our trees and till and bone for more seeds and Pams saplings. Just remember to remind yourself, LEAVE ONE PATCH OF GRASS so it replenishes
 itself. Overhead, we construct a stairway going up so we can shear the jumbo trees without jumping as much. We also make a glass walkway overhead so the trees don't grow too large - as we're still doing this by hand and the bigger the tree the greater the hunger you will feel. Right next to it we also set-up our composting station with a chest for the organic mats connected with an item node to the pipes above the barrels and dirt taken from below with TE itemducts to the dirt chest. None of which requires a servo.
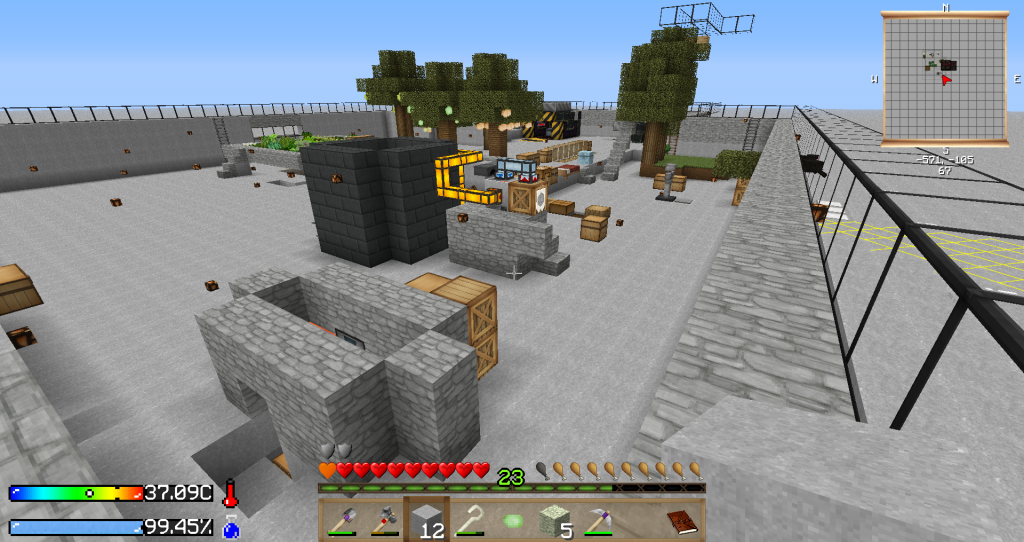 You'll also want to make yourself a cobblestone generator. Now, you could to it with the extra utilities node as this would be a fast, cheap and easy way to make a cobble generator. You could make the stone with the pyrotheum and water by drawing the two together into a canal that meets up - if you're not derpy. I am.
Thus, I prefer the old-fashion cobblestone generator - for several reasons besides being derpy. First, I like to get both cobble and gravel at the same time. If I were to do it with the node, I'd get a lot of cobble, but the gravel, I would have to hammer from cobble. If I do this set-up, I can put my Autonomous Activator on the generator to mine cobble and hammer the stone at the same time. This would mean I can devote my hammer time to my sieving gravel time instead - because I like my bling as soon as possible (and we need a lot of iron for pneucraft). This also lets me level up a bunch of TiCon pickaxes. Which could be useful if you go to a city in 1.2 because the spawners would take a considerable time to break with just a bone/flint pick, I hear. Second, this generator will also spawn the occasional squid as a side benefit. Which can be used to craft your initial black plastic seed for pneucraft. Sometimes, you'll even find the seed already made for you in the chest. Of course, once you have enough gravel for your needs, you can also replace the AA with the item node or a terrain smasher and just get cobble.
And once you do remove the AA from the cobble generator, you can devote him to sifting for you with this set-up - no water or ender pearl required. As the gravel will yield more iron than the dust and give you diamonds for armor to boot, we'll have him do a combo of dust and gravel while we do more base building. There might be other ways that are less space consuming but I always find it kind of funny to watch my sifted items flow along the path to the dumping chest at the end. We set up the AA on one end with a fan both activated by the same lever. You can also stand across from the AA and help him along for faster sifting. The items from the sieves will float gently across the runway all the way to the end where it will drop into the hopper and then into the chest. Later we connect some nodes and pipes to a bunch of jabba barrels because it looks prettier. The only disadvantage to this set-up is - it will sometimes push you along as well. It will also push along the occasional endermen if it appears around this area.AND of course, it goes without saying the first thing you do after getting a bed and securing your immediate water/food needs was to enlarge the ditch and wall area so you'd have the space to do all the above. But I figure that goes without saying. Seems obvious. I mean, what idiot would do all of the above without first enlarging the base, right? Right? Right? *sigh* goes back to building the walls around the trees.........
*So, if you're doing some base building? I'd consider doing some of the above from the end to the beginning of this walkthrough...........
日本語編は又後日に改めてって事で良いでしょうか?
Monday, August 25, 2014
約束とは
守られない事が多い自分です。でも一応努力はしようと思いますのでザっと先日(何日前までが先日になるんでしょうか)のお浚いを少しをば。という訳でこんなに立ってからの先日の更新です。
えっと、食べ物に関してだったと思います。で、このモッドパック食べ物系モッド色々と入ってます。HarvestCraftで食物の数が半端ない物になっています。HungerOverhaulで食物の育ちが悪くなっていたり、SpiceofLifeで偏食にさせられたり、色々と食べ物の為に苦労と強いられます。
大体30回程モッドの事を心配しなくても普通に食事ができます。でも設定限界に達すると続けて同じ物を食べる事が出来なくなります。じゃなくて、食べても腹減り具合は治らなくなると言った方がいいかもしれません。要するには偏食病になります。贅沢なヤツだと思いました。自分なんて毎日同じ物を食べても飽きないのに。ゲームの癖に贅沢な奴。腹は減らんかったが起ちますね?
で、ですね?食品多い方が良いと言う事になるんですが始まった段階から計画を した方が良かったりします。困った時の神頼みは良くありません。何とか成りますが運しだいです。水の次に心配になるのが餓死だからです。偏食しなければいいのに。
気を取り直して、食べ物で初期段階から並べるとゾンさんが落として下さる肉が挙げられます。でもこれには難点があります。有りの侭食べると食中毒に罹ります。その為に、処理をします。先ずはDryingRackを使って燻製します。或は塩を二個使ってクラフトすると燻製ができます。両方とも違う種類の食品と確認されます。
この他にクエストをこなしますと食材を貰えます。有難いのが米の種とオレンジの苗木です。この二品は4つ目の土ができる頃になると米、オレンジの順に植えることを進めます。米の場合骨粉を振るって即食べられるからです。苗木は木は直ぐ育ちますが実を育てるのは時間だけだからです。待つ時間が惜しい時は未だか未だかと言いたく成ります。でもかなり早い具合の熟成期間である意味果物系苗木等は種系の食品より初期段階向きかもな感じです。自分的にですが。
で、米とオレンジですがコレも工夫すると処変わらず品変わるをしてくれます。米を焼きますと煎餅に成ったり、オレンジも搾るとジュースが食べれます。ジュースでも食べ物です。飲み物に悪しからず。 でも、搾るにはHarvestCraftのジューサーJuicerを作らなくては成りません。その序でに他のHarvestCraftお料理道具を作っておけばクエストも完成しますし、料理の幅も増えます。クエストの褒美に貰える道具も在りますので確認してから作る事をお勧めしいます。
で、道具作り終わったら卵と魚にも活用幅が増幅されます。魚の場合焼くだけの焼き魚だけではなく、フィーシ・バーガーFishBurgerとかも出来ます。卵の場合は鶏に孵すだけではなく卵その物を料理しましょう。炒り卵やゆで卵とかにして食品の幅を広げていけば食い繋ぐことも出来るように成ります。
又、FryingPanですがHarvestCraftの物だけではなくTinker's ConstructのFryingPan(ASではお馴染みかと)を使われた場合、未だ竈が作れない場合食材を焼く事が出来ますので便利かもしれません。武器としても便利です。ノックバックとノロノロ効果が付随していますので。お負けに骨粉で造れます。(骨のTinker's Contruct武器道具類は骨粉でも大丈夫です。と言うかこの方が得って気も)。
このようにして色々と食品の幅を増やしても限界も有りますので(要するに腹持ちが悪いんですね。で、一々食べるのもの面倒い・・・モノグサもここまでくれば立派だと想います)食物の数を増やす為に畑を創りたいと想います。で、畑には土が必要です。種も必要です。道具も必要です。
で、土の作り方は分かったので種ですがクエストの米と苗木だけでは心許内のでもっと種を狩りましょう。これはあくまで土が用意に手に入る様になってからの方が良いんですが時には冒険も必要かもです。土をSieveに掛けると種が得られます。食品の種でPeanutピーナツ,Soybean枝豆、トマト等だったと思います。でも、一番の狙いは草の種です。PeanutとSoybeanは勿論需要が絶えない食品ですがこれ等よりも草の種が良いんです。コレが在ると草が作れるからです。畑の前に草畑を作っておきます。コレに骨粉を掛けるとフルーツが生えたり食物の苗木が生えたりします。苗は其の侭植えますがフルーツは種にしてから植えます。フルーツをクラフトすると種ですね?
で、道具の話になりますが畑を耕すにはhoe鍬です。が、此方の鍬は一回の使い捨てです。でも背に腹は変えられないので材料が足りない時一回の使い捨てでも有り難やだったりしました。何回か繰り返せば覚えられるかもしれません。もっと材料が揃っている時に鍬より使える道具を作っておこうって。で、その道具がMattockだったりしいます。MattockはTinker's Constructの道具で斧とスコップのパタンで骨分Mattockを造れます。このMattockで便利なのは畑を耕せることです。でも水の潤いが届く範囲でしか耕せないので土ブロック数える必要が無くなって便利。数えるのって苦手なんです。後このMattockですが先程の草畑に使うと偶に種をくれます。この際の注意事項ですが草ブロック一つ残さないと草が生え返れません。後、水が近すぎると土に戻らずFarmland食物専用土に変わるので種が出ませんし、草も生え返りません。
で、ここ迄来れば後は畑を徐々に増やしていけば何れ食品にも困らなく成るんですね?大体が9x9の畑が目標だったりします。畑から毎日セッセと刈っては喰いでも大丈夫に成りました。でもお料理した方が腹持ちが良いのでPeanutButter & Jelly Sandwichシリーズを作ってます。お負けとしてタダでガラス瓶が貰えたりするので。タダって良いですよね?
えっと、食べ物に関してだったと思います。で、このモッドパック食べ物系モッド色々と入ってます。HarvestCraftで食物の数が半端ない物になっています。HungerOverhaulで食物の育ちが悪くなっていたり、SpiceofLifeで偏食にさせられたり、色々と食べ物の為に苦労と強いられます。
大体30回程モッドの事を心配しなくても普通に食事ができます。でも設定限界に達すると続けて同じ物を食べる事が出来なくなります。じゃなくて、食べても腹減り具合は治らなくなると言った方がいいかもしれません。要するには偏食病になります。贅沢なヤツだと思いました。自分なんて毎日同じ物を食べても飽きないのに。ゲームの癖に贅沢な奴。腹は減らんかったが起ちますね?
で、ですね?食品多い方が良いと言う事になるんですが始まった段階から計画を した方が良かったりします。困った時の神頼みは良くありません。何とか成りますが運しだいです。水の次に心配になるのが餓死だからです。偏食しなければいいのに。
気を取り直して、食べ物で初期段階から並べるとゾンさんが落として下さる肉が挙げられます。でもこれには難点があります。有りの侭食べると食中毒に罹ります。その為に、処理をします。先ずはDryingRackを使って燻製します。或は塩を二個使ってクラフトすると燻製ができます。両方とも違う種類の食品と確認されます。
この他にクエストをこなしますと食材を貰えます。有難いのが米の種とオレンジの苗木です。この二品は4つ目の土ができる頃になると米、オレンジの順に植えることを進めます。米の場合骨粉を振るって即食べられるからです。苗木は木は直ぐ育ちますが実を育てるのは時間だけだからです。待つ時間が惜しい時は未だか未だかと言いたく成ります。でもかなり早い具合の熟成期間である意味果物系苗木等は種系の食品より初期段階向きかもな感じです。自分的にですが。
で、米とオレンジですがコレも工夫すると処変わらず品変わるをしてくれます。米を焼きますと煎餅に成ったり、オレンジも搾るとジュースが食べれます。ジュースでも食べ物です。飲み物に悪しからず。 でも、搾るにはHarvestCraftのジューサーJuicerを作らなくては成りません。その序でに他のHarvestCraftお料理道具を作っておけばクエストも完成しますし、料理の幅も増えます。クエストの褒美に貰える道具も在りますので確認してから作る事をお勧めしいます。
で、道具作り終わったら卵と魚にも活用幅が増幅されます。魚の場合焼くだけの焼き魚だけではなく、フィーシ・バーガーFishBurgerとかも出来ます。卵の場合は鶏に孵すだけではなく卵その物を料理しましょう。炒り卵やゆで卵とかにして食品の幅を広げていけば食い繋ぐことも出来るように成ります。
又、FryingPanですがHarvestCraftの物だけではなくTinker's ConstructのFryingPan(ASではお馴染みかと)を使われた場合、未だ竈が作れない場合食材を焼く事が出来ますので便利かもしれません。武器としても便利です。ノックバックとノロノロ効果が付随していますので。お負けに骨粉で造れます。(骨のTinker's Contruct武器道具類は骨粉でも大丈夫です。と言うかこの方が得って気も)。
このようにして色々と食品の幅を増やしても限界も有りますので(要するに腹持ちが悪いんですね。で、一々食べるのもの面倒い・・・モノグサもここまでくれば立派だと想います)食物の数を増やす為に畑を創りたいと想います。で、畑には土が必要です。種も必要です。道具も必要です。
で、土の作り方は分かったので種ですがクエストの米と苗木だけでは心許内のでもっと種を狩りましょう。これはあくまで土が用意に手に入る様になってからの方が良いんですが時には冒険も必要かもです。土をSieveに掛けると種が得られます。食品の種でPeanutピーナツ,Soybean枝豆、トマト等だったと思います。でも、一番の狙いは草の種です。PeanutとSoybeanは勿論需要が絶えない食品ですがこれ等よりも草の種が良いんです。コレが在ると草が作れるからです。畑の前に草畑を作っておきます。コレに骨粉を掛けるとフルーツが生えたり食物の苗木が生えたりします。苗は其の侭植えますがフルーツは種にしてから植えます。フルーツをクラフトすると種ですね?
で、道具の話になりますが畑を耕すにはhoe鍬です。が、此方の鍬は一回の使い捨てです。でも背に腹は変えられないので材料が足りない時一回の使い捨てでも有り難やだったりしました。何回か繰り返せば覚えられるかもしれません。もっと材料が揃っている時に鍬より使える道具を作っておこうって。で、その道具がMattockだったりしいます。MattockはTinker's Constructの道具で斧とスコップのパタンで骨分Mattockを造れます。このMattockで便利なのは畑を耕せることです。でも水の潤いが届く範囲でしか耕せないので土ブロック数える必要が無くなって便利。数えるのって苦手なんです。後このMattockですが先程の草畑に使うと偶に種をくれます。この際の注意事項ですが草ブロック一つ残さないと草が生え返れません。後、水が近すぎると土に戻らずFarmland食物専用土に変わるので種が出ませんし、草も生え返りません。
で、ここ迄来れば後は畑を徐々に増やしていけば何れ食品にも困らなく成るんですね?大体が9x9の畑が目標だったりします。畑から毎日セッセと刈っては喰いでも大丈夫に成りました。でもお料理した方が腹持ちが良いのでPeanutButter & Jelly Sandwichシリーズを作ってます。お負けとしてタダでガラス瓶が貰えたりするので。タダって良いですよね?
Sunday, August 17, 2014
I hate to say it but
PneumaticCraft is such a pain in the nether regions. So much waste and so much breaking. Not that it's particularly hard but it's so .........bah humbug. Especially since I'm so derpy. For lack of a better description. Good thing we're not going to talk about it today.
Because we left off worried about water and food and so we pick up there first. Now, our first priority was water simply because the water depletes faster than our food bar. Especially if we aren't running around killing all the mobs by punching them. After considering several options, we've or rather I, normally chose to concentrate on water by dirty water smelting, at this point because of its relative cheapness.
Now that the water option is taken care of, we can concentrate on our other concern of life and death, FOOD. Yes, just about the time you get your furnace and managed to survive this long, you will begin to notice your food bar is getting rather low. If you had an unfortunate run in with four spiders and a creeper riding on one of them, it'll be even low. Especially if it happens all at once. Be sure to check above before walking out from your leafy canopy.
Anywayz, this modpack has Spice of Life (SOL) installed, along with Harvestcraft. There's also something called HungerOverhaul which kicks in. Working all together, they bring about a new meaning to the terms of starving to death. Here, in Crash Landing, if you don't eat aka get down to your last hunger bar, you will die. Immediately. No - wait, wait, wait, let me go get the stack of rotten flesh I have in the chest to eat. Here, it is - always, always, carry several types of food on you at all times and at least 1 bottle of water. Why not just your stack of rotten flesh? Well, that's SOB for you. Opps, rather, SOL for you.
True feelings aside, at the beginning we are granted a buffer against SOL and all the other nastiness from those mods above. Actually, Harvestcraft is rather nice by itself - one of the reasons I like playing mods. We can eat whatever we want as much as we want to restore our hunger - as long as it's edible. This said, I will add on the qualification here. Rotten flesh will cause you hunger if eaten as is and since we know you can starve to death, eating rotten flesh on an empty stomach can be detrimental to your health. Really.
So, how do we progress then? Well, we worked towards our water production by creating dirt via saplings in wooden barrels. We need several barrels - at least 3 but 5 would be better. So in between crooking trees, sifting dust, making your tinker tools, be sure to make your barrels too. The first three barrels, you will devote to dirt for water. When you finally have enough to fill the fourth barrel, smile. Your food production will begin to start.
But what if you still only have enough saplings for 1 barrel? And your hunger bar keeps going down? Never fear, we have you covered. Prior to farming, you have several options available for food as well. Never as good as farm food but it'll do until you have a dirt to farm from.
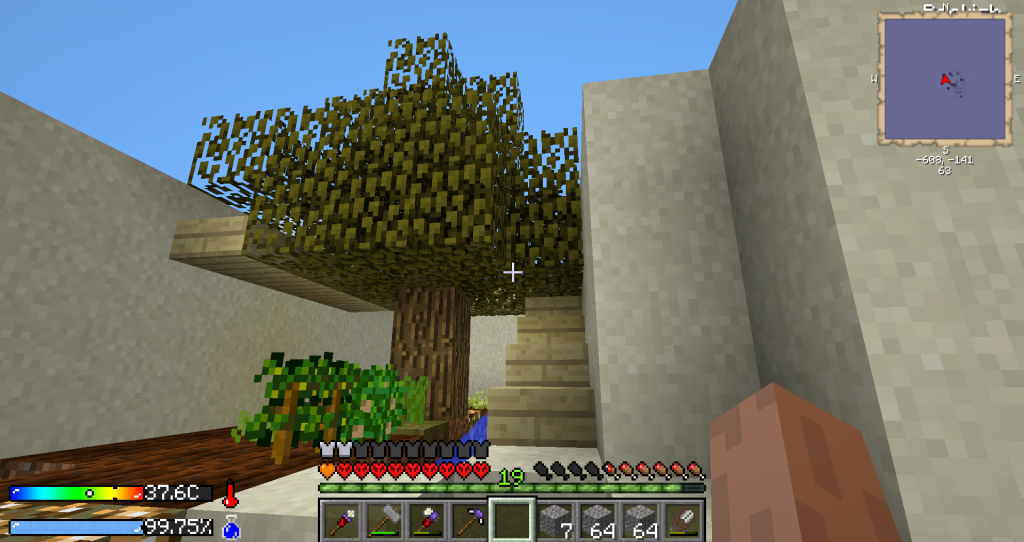 |
| a bit cramped but I like it |
Option 1 - zombie flesh. Yes, I know I said you shouldn't eat it because it causes hunger and you might starve to death. And I stand by that. You can, however, prep the meat prior to consumption so it can be eaten. Just like you can drink or use muddy water, you can eat poisonous flesh. Preparations can be made in one of two ways. One, you can make some drying racks - like in AS, 3 wood slabs form a drying rack. You can hang the flesh from there and make edible jerky from it. The other, quicker way, would be to salt the meat with 2 pieces of salt you get from sifting dirt. This also creates an edible jerky. These two jerkys though qualify as two different food types so once SOL kicks in, you will have a different food option to keep your hunger bar full.
Which is good because SOL and the other mods make it so that once it kicks in you get finicky about your food choices. If you eat more than five of the same type of food, it no longer fills your stomach and you stay hungry. And it fills you up less each time. The only way to stay full then at this point would be to switch to a different type of food. So having two different types of jerky would be important in the beginning if you don't have a lot of food choices.
But that's only two types of food you have there, and you want a lot more available to you so you can get the food problems out of the way. So, that extra fourth dirt piece you finally got? Put it down and plant either the rice or orange tree you get from the quest. Preferably the rice as you can bonemeal it into an edible item whereas the fruit tree, you will have to wait for it to mature after you bonemeal it into a tree. So, rice first, tree on the next dirt piece.
However, if you're still desperate for more food at this point, consider sifting dust. And pray to get lucky. I did. And good thing someone was listening because I had a bunch of eggs and fishes from the dirt(<meant dust here). This too can be cooked for more food. So to this end, we can invest in a bunch of cooking utensils from Harvestcraft to help cook the food. Eat the orange raw or juice it for juice. The egg is normally not edible by itself but craft it with a pot from Pams mod and you can eat a hard boiled egg. Or scrambled eggs if you have a frying pan from Pams - not the tinker's one.
Speaking of which, the tinker's frying pan can be useful for early game play both as a weapon and also as a cooking utensil. Because one of the byproduct you get from crooking trees is silkworms, which we learned from AS is edible once you cook it. So you could also choice to make this from your excess wood to cook the silk worms if you don't have enough to make a furnace yet. It could also cook your fish and rice (yes, you can cook the rice and have another food type available) at the same time for more fuel efficiency. Depending on your luck, you may not need it at all - I tend to be lucky.
When you do get enough saplings to spare for the first dirt piece though you'll need to go get the water from the crash site. So to this end, we either make a clay bucket from the clay that is holding the water or if we have enough iron, we make a bucket. Now, in the version I am playing, we are still lucky enough to be able to craft grout. However, if you are playing version .2 and on, unfortunately for you, you can't make grout. Which might be lucky in this case because you can just chose to make your bucket from clay and use the iron for shears. So, maybe I was unlucky because I had to chose. And I chose to make grout - later.
Once you've selected a spot for your water and farmland, you can now prep the dirt by tilling it with a hoe or mattock. I didn't have enough wood to make a mattock when I noticed my hunger bar so I ended up making a hoe. It only has one use but one time is all you need in the beginning. And beggars can't be choosing so I made my hoe and tilled my block of dirt. As a note, if you use a mattock the water needs to be in hydrating distance of your dirt piece or it won't even till the dirt for you.
So, now hopefully you're on your way to surviving and thriving (in the words of my favorite minecrafter). And remember to sleep at night to help. Next on the list a few thing I do after the first bed to make life easier.
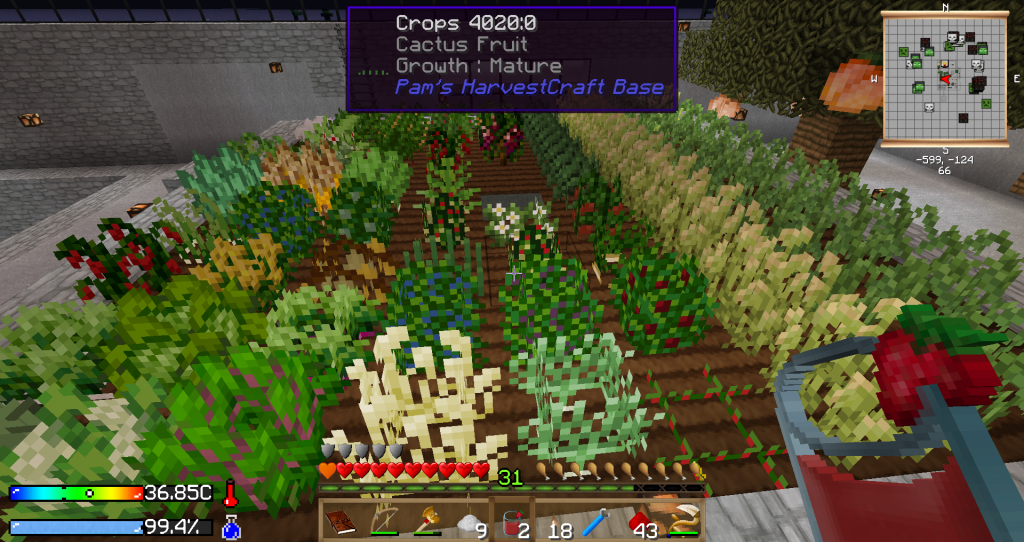 |
| Soon you too will have a farm. In the meanwhile, feel free to drool :P |
Finally, sorry if the writing is more confusing than normal. Mom's been talking to me for the last few hours. Non-stop. While I write this. I'm going a bit nuts. Sighs.
気力が・・・・・
湧きません。済みません。本日、延々と続く母の与太話に四時間以上付き合っている最中です。未だ朝です。午前十時です。大した事書いていません。頑張って英語読んでください。どうしてもって方は明日か明後日か当たりに日本語編ありますかも。ないかも。風船の灯に鳴っています。
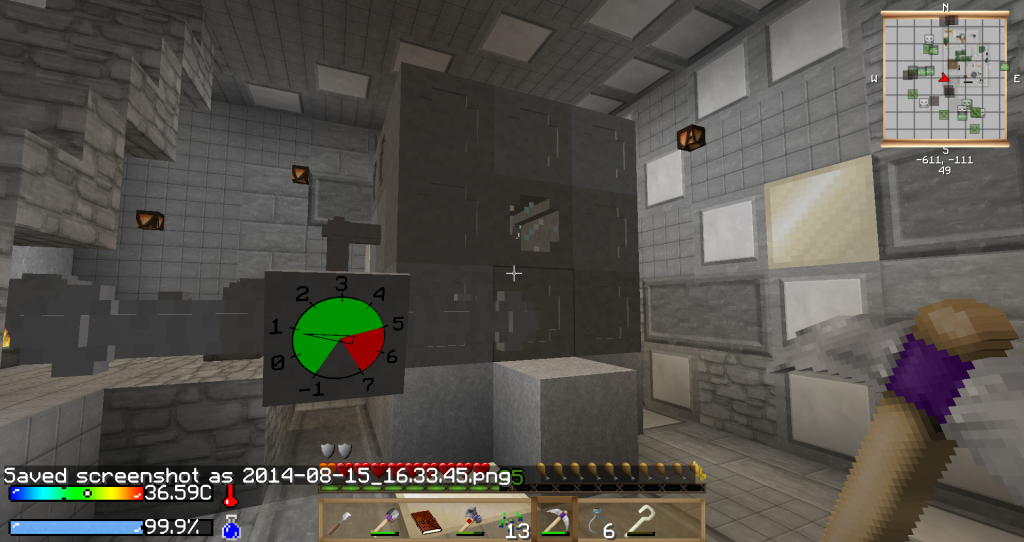 |
| 要らないのなら次回の次回当たりでこれの説明かも。 |
Wednesday, August 13, 2014
I KILLED AN ENDERMEN!
ME, always playing on peaceful, needed to kill me an endermen for a quest and I manage to do it! Well, actually, I managed to do it the three times I died before too but then again, I died soon after so maybe it was the ender curse? On previous attempts, I even built a small safehouse to do it from. This time, the darn fellow popped up before I was completely ready. They're bad for your heart. I'm so happy that's over. Unfortunately, for me, the good news ends there. *boo hoo*
Now, for the bad news, the modpack has been updated to its newest version. There are suppose to be ruins to explore, all the scary mods are turned on along with griefing, and on top of that, your grout is no longer attainable unless you go to explore the ruins with it's mobs, dark chambers, even scarier mobs and various spawners. Just for that I probably won't be updating - for a while anyway. At least until I finish more of the quests and get a handle on the pnuenue craft thing first. At the very least. Hope I never understand how to use the pnuenue.
Now, for the bad news, the modpack has been updated to its newest version. There are suppose to be ruins to explore, all the scary mods are turned on along with griefing, and on top of that, your grout is no longer attainable unless you go to explore the ruins with it's mobs, dark chambers, even scarier mobs and various spawners. Just for that I probably won't be updating - for a while anyway. At least until I finish more of the quests and get a handle on the pnuenue craft thing first. At the very least. Hope I never understand how to use the pnuenue.
やっと笑んだ!
と言うかやっとエンダマンを倒すことが出来ました。自分にパチパチ。余りの嬉しさに報告に来ました。いえ、ですね?大抵ピースフルで遊んでいる者で園田さんとドンパチ遣らないモノですから急なご来訪にピックリでクエストの為にずっと狙っていたのですが中々上手く逝かなくてイライラしていたのですが本人がいらっしゃったので嬉しい限りでした。行くな逝け行くな逝け行くな逝けをずっと唱えていたのが効いたのでしょうか?
で、良い報告序でに悪いお知らせも。遊んでいらっしゃるのならもうご存知でしょうがヴァージョン・アップです。新マップで基地が大きく、遺跡も追加されています。それでもって、モッブもヴァージョン・アップ。よりBnBに近い感じのモッブになっています。木は板にしたり加工した物は壊されるかも。壁際に立つと感知されて爆死かも。とか。とか。とか。更に遺跡には追加モッブの吸血鬼のゾン豚さんも居るらしいです。木の剣でしか倒せなかったり。でもって、木の剣って耐性1しかないのに・・・・・・・・。後、遺跡探検は必須になっていたり。じゃないと、工房が立ち上げられません。グラウトGroutが創れなくたっているので遺跡に逝って探して来いとの事でした。モッブ・スポンナーもドッサリ壁にのめり込んでいたりする所に逝って来いとさ。シクシク。当分アップ・デートしないかもです。少なくてもヌメヌメ・クラフト制覇出来るまでは。出来る日が来ないと良いなと思ったりしませんか?自分的に。
Subscribe to:
Posts (Atom)